Threading and Tapping Holes in Metal

A tap

standard 3 piece tap set

cuts threads on the inside of a hole – known as FEMALE threads, to accept a machine screw or bolt. Taps can also be used to restore an internal thread

Typical Internal Thread

that has been damaged or to cut a new, larger thread in the case of severe damage or stripping.

The opposite of an internal thread is an external thread – MALE thread

External Thread

which you can cut using a die

Split Die

Taps come in 3 types – usually as a “set”, starting a first cut, middle or 2nd cut and lastly a bottoming or plug tap. 1st cut has the most taper and is design to start the thread in a new hole, 2nd has a bit less, bottoming will cut threads all the way to the bottom of a blind hole. You can usually get away with just 2nd and bottoming. If you are cleaning out a hole, I would use 2nd or plug tap because there is less risk of cross threading, which is easy to do in a mangled thread.

Dies on the other hand usually come as a Split Die – this is to allow the Die to be “opened out” to make the first cut on a round shaft easier to start (similar to a first cut tap), and then closed a little to finish the thread to a good fit to the nut or female thread.

So to recap a “TAP” is used to make a FEMALE or INTERNAL THREAD, a “DIE” is used to make a MALE or EXTERNAL THREAD.

A TAP needs a TAP HANDLE which clamps the “tap” in place in order to be able to manually turn the tap to produce the cutting action

Tap Handle

These come in various forms, as above or

Tap Wrench

Both types are often called a “TAP WRENCH

If we are going to put a female thread into a part we will need to know what size to drill the hole. In order to do this we must look this up on a “Tapping drill” chart see example below.

Tapping Drill Size table

A good idea for most engineers is to invest a couple of pounds into a ZEUS book which contains many “technical” charts / tables / formula that engineers require – they are worth every penny –

An extremely handy pocket sized reference booklet of data charts and tables for the drawing office, toolroom or workshop.

This metric revision publication is produced by Zeus Precision Charts Ltd, who are members of the British Standards Institution.

The 28 laminated pages contain data on standard drill sizes and decimal equivalents, tapping drills and clearances for metric and imperial threads, BS4500 tolerances, hardness comparisons, jig boring co-ordinates for equally spaced holes, allowances for sheet metal bending and Morse tapers.

Also, long tables for sine, cosine, tangents and cotangent.

Threading a hole is a skill, the tap has to be aligned with the hole and care needs to be taken to ensure that the thread stays aligned with the drilled hole otherwise you can end up with a thread running at an angle to the hole that has been drilled.

When tapping a standard right handed thread you must take great care to “break off” the swarf that is being cut from the inside wall of the hole. To do this we wind the tap in clockwise 1 turn at a time, stop and then turn back (anti-clockwise) 1/2 a turn. It is also a good idea to use some form of cutting compound to “ease” the process.

Typical Manual Tapping

Great care must also be taken with consideration to force being used and resistance being felt through the tap handle. If there is excess swarf build up the the rotary motion of turning the tap becomes difficult and “tight”, this may also be true if no tapping / cutting fluid or compound is used and certainly if the hole has been drilled out too small. As the actual tap is made of hardened steel it is possible to break a Tap off in the hole you are tapping, particularly with smaller taps.

Automated tapping heads are available for pedestal drilling machines, these actually reverse the action before too much pressure is built up thus reducing the chance of breaking a tap.

More than likely though it is worth investing in a good quality Tap & Die set – Recommended is this DRAPER set – if looked after will last a life time.

Draper 79203 37-Piece Tap and Die Set

Click on image to take you to Amazon site

Product Description

Manufactured from carbon steel. Taps and dies suitable for cleaning and cutting threads on mild steel and aluminium. Supplied with the correct drill bits for tapping. Contents held in plastic insert within steel storage case.

We can repair threads in aluminium, mild steel, stainless steel & castings

SEE –

www.flashcustoms.co.uk

Don`t forget to email or call us for all your custom made 1 off bespoke items.

Thanks for reading our blog – we hope this has been of use to you.

Recommended sites

FLASH CUSTOMS – Specialist Custom Car & Motorcycle Parts
Loaded Wallet – Discount and cash back offers
Cash Back – Cash Back & Money Saving offers

Induction Kits and Performance after market filters – do they really give more BHP

Do Induction Kits or High Flow Air Filters really increase engine power.

To understand the principle of filters we can compare an intake system on a normally aspirated 4 stroke engine to our own air intake system. Humans have very High Flow Air intake system with minimal restrictions slowing the air intake. We have hairs in our nostrils and we have mucus lining our air nasal system to trap or capture dirt and dust, this dirt and dust is removed by Cilia (tiny hairs in the lining of the nasal cavity and trachea) which move these “contaminants” back up to throat, which is then coughed up or mechanically blown out through the nose. Still our lungs are susceptible to dust ingress which long term could damage the lungs efficiency.In exactly the same way an engines intake system must have some method of “filtering” the air intake to remove dirt and dust. This is even more critical to an automotive engine as it has no way of removing any damaging dirt particles that may reach the combustion chamber and damage the internal parts of the engine and cause premature wear. If the air is not filtered to a high level before the air charge enters the combustion chamber there could be the opportunity for these particles to damage, pistons, cylinder bores, combustion chamber, spark plug electrodes, injector nozzles, piston rings and so on. This could all lead to premature wear or imminent failure of the engine.

Typical “element” air filter

Shown above is a typical “element” style air filter used in most cars. These are adequate at filtering out dirt and dust but by no means the most efficient when it come down to air flow and performance.

What are we trying to achieve with an after market Induction Kit ?

Many claim to improve air flow, many claim to improve BHP or engine power or torque or all of these.

Mmmmm lets think for a moment !

A bit of science first. Cold air is more dense that Hot air so common sense tells us that cold air will have a higher concentration of oxygen particles in the same volume of air when compared to hot air !  FACT.

Therefore forgetting about Performance Filters and spending wads of dosh – consider getting a cold air supply to your intake. If you want to get more “BANG FOR YOUR BUCKS” you need to be feeding COLD AIR into your intake system. If your intake system draws air from under your bonnet you may well be sucking hot air (engine heat, manifold heat, turbo heat etc etc)  into your intake a BIG NO NO straight away. Now we have a cold air feed or an intake pipe that is drawing cooler air from outside of the engine bay we can consider filters, filter boxes, etc.

There are many differing types of after market filters available, do a bit of research and take time to make a “judged” decision. Panel, cone, paper element, wire gauze, cotton, sponge are all types that could be found to fit your car or bike or truck or whatever vehicle you are looking for ! So now we have considered air supply, lets look at the filters available – Above are a selection of filters you might come across when searching for intake filters By methods of research and testing FLASH CUSTOMS can say from experience that lightly oiled cotton filters offer the best flow rates of any. This is ok but many applications are not covered by these types of specialist filter.

We would recommend for average FAST ROAD use that a modern gauze type filter or sponge filter (panel, cone etc) be used with impregnated dirt re tentative spray, both far better than a standard paper element filter. Only a very slight coating of oil spray will aid filtration. If excess oil is coating the filter this may actually reduce the flow and even worse clog up your MAF sensor (Mass Air Flow) and confuse your ECU, simply making matters worse. Make sure you clean the MAF sensor regularly if this is the sort of intake system you have.

Whatever after market filter you fit, remember one rule of thumb:- the larger the surface area of the filter, the better the air flow.Most after market filters allow for complete removal of the original air box, good and bad arises from this.

  1. You will generally have far more induction “ROAR”, boy racers may love this !
  2.  Better AIR FLOW can generally be achieved with after market filters.
  3. Positioning of “open” filters is critical (due to hot engine bay temps)
  4. A 20 degree rise in temperature can reduce BHP by as much as 3%
  5. Smaller engines sometimes suffer from a POWER LOSS when fitting “free flowing” after market filters
  6. Sometimes it is best to fit a replacement “free flowing” after market panel filter in your standard air box particularly for smaller engine sizes.

So as you can see there are positives and negatives to after market filter kits, getting the right one for your car, keeping intake charges “cool”, fitting in a designated “air box” or open is all things that need to be considered.

Filter with cold air feed pipe

Filter positioned at back of engine where lots of heat will accumulate

A shielded Filter set up, reducing the impact of under bonnet temperatures

Simple aluminium ducting that can be used to direct cool air into the filter

At FLASH CUSTOMS we still recommend a specially built induction box to fully surround the after market high flow filter with a cold air feed into the box. This must be sealed to stop hot under bonnet air entering the box and in some instances I have seen customers insulate this box as well!

I have personally seen many young drivers add a simple after market induction kit mounted totally in the wrong place, open to hot air temperatures with no cool air supply and wonder why it makes no difference what so ever to the performance of their car. But, it makes lots of induction roar so it must be going faster ?

With a little bit of thought and not always a lot of money these sometimes quite expensive induction kits can be made to work a lot better and actually give your car some extra performance.

Another “myth” that some kits promote is “RAM AIR” where simply a feed pipe is mounted in the front grill or under the bumper in the flow of air hitting the front of the car. Ram air systems really don’t work up until you reach approx 100mph (so absolutely no use what so ever in normal road driving conditions. Secondly many performance filters tend only to really work at higher engine revs and will in fact be detrimental to the lower end power band.

So personal conclusions to this blog on after market filters is that:- if you have a smaller engined car go with a high flow panel filter to simply replace the original and make sure that you have a nice cool air feed to the intake. For larger engines if you can go with a cotton gauze filter with a cold air feed and an enclosure to prevent hot air getting into the intake.

A final take on this subject, no matter what you do to your intake system to improve it if the intake manifold is rough, and edges and lumps and bumps in it, has mis-matched joins that do not allow “smooth” air flow you will be wasting your time trying to improve your intake system. Get the manifold “gas flowed” and the make sure that every piece of pipework and join is smooth as can be to help air flow.

Here at FLASH CUSTOMS we tend to prefer smooth bore thin wall aluminium tube to make up an induction pipe run, this is much more efficient at allowing air to flow smoothly compared to other types of pipework such as concertina type aluminium or plastic air hosing.

Smooth bore mandrel bent aluminium tube

——————————————————————————————————————————–

Recommended Reading

This work is aimed at the enthusiast engine tuner and race engine builder. Founded on the author’s many years of experience in building, tuning and modifying high-performance engines, it sets out the principles involved in forced induction, supported by tables and numerous illustrations. From basic theory through to building a rugged engine, all the important aspects of supercharging and turbocharging are explained and analysed.

——————————————————————————————————————————————–

FLASH CUSTOMS – Specialist Custom Car & Motorcycle Parts
Loaded Wallet – Discount and cash back offers
Cash Back – Cash Back & Money Saving offers

Carbon Fibre Wrapped Oil Catch Tank.

Wrapping” is becoming ever more popular in the automotive industry. Many effects, colours and designs can be achieved using vinyl wrap. This can be used to change the body colour of a car, or other vehicle, or used in business advertising for company vans, cars and vehicles.

Not only can you change the appearance of your vehicle but a vinyl wrap also helps to protect your vehicle from day to day scuffs and scrapes, swirls and scratching.

Heat activated adhesives backing the wrap material leave no real residue should the wrap ever be peeled off the vehicle and if applied correctly a stunning effect can be achieved for a lot less than a respray and or airbrushed artwork.

We came across a very good company for wrapping  vehicles and parts, they have wrapped a simple alloy catch tank for us to showcase their skills in wrapping smaller items.

The wrapping on this tank is a carbon effect wrap and is an excellent and effective finish. We simply wanted something different and this sure is, I think you`ll agree it looks absolutely awesome.

The beauty of this is that heat should not affect the wrapped finish, should the Oil Catch Tank get hot vapours through it.

John our wrapper gives a few bullet point tips for wrapping parts

  • Make sure your using good quality carbon fibre vinyl wrap
  • Measurements of the item your wrapping, do not cut direct to the size of the item, allow overlap
  • Applying the carbon wrap- clean the item or items before applying the wrap clean this by (alcohol related liquid) and wash thoroughly by cleaning this gets all the grime anything that has attatched on the object, it will remove them which will give you a smooth finish.
  • When you have measured your vinyl then at constant heat with a high temperatured heat gun the glue will then be activated and ready to be stuck to any surface ( you have to know when the vinyl is flexible enough to apply)
  • Work out the bubbles and creases bit by bit, but also making sure the vinyl doesnt skrink too much around the object.
  • Any overlap may be cut/sliced with a sharp tool
  • A lot of patience time and skill is required for a great outcome.

 If you would like help in getting your car, vehicle or parts wrapped you need to contact John email – carbonwrap999@hotmail.co.uk

www.flashcustoms.co.uk

Don`t forget to email or call us for all your custom made 1 off bespoke items.

Thanks for reading our blog – we hope this has been of use to you.

Recommended sites

FLASH CUSTOMS – Specialist Custom Car & Motorcycle Parts
Loaded Wallet – Discount and cash back offers
Cash Back – Cash Back & Money Saving offers

Buying a MIG Welder – Continued

The quality of a MIG Welder varies tremendously, dependant upon country of origin. Some welders made in eastern Europe / Taiwan / China tend to be of a lower price and accordingly of lower quality, they tend to have cheaper electronic components, don’t always last as long and spares are often difficult to get hold of.

A welder that has a higher initial cost may save you money long term as usually electronic components and wire feed and drive units are of superior quality. So its definitely worth putting in a bit of leg work before buying.

A point worth noting is that searching for a local welding supplier may be worth it as they will advise you of what spares they carry or have access to should your welder go wrong, they will more than likely be able to advise you on a purchase.

A DIY MIG Welder that is occasional use only may cost you in the region of £200 to £350 dependant on make or model. You may also consider searching on-line or in local adds (Gumtree for example) for a good used MIG welder. A used welder that has been appropriately maintained and cared for might be more than sufficient in meeting your needs and come at a price you can afford. However, beware as a good second hand MIG welder will command good residual value even more so if it is a single phase 240v 3 pin plug supply that will run from a 13 amp household socket.

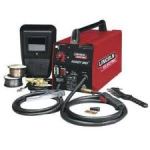
Features to look for in a MIG Welder may be :- ease of use, large or small torch, “euro” torch connector, size of filler wire reel, portability (is the welder on castors or light enough to lift and move around). Does the welder have a series of rocker switches, giving combinations of output amps, or does it have a dial to increase output amps (which is infinitely more adjustable than rocker switches). All of which may make for easier use.

The material thickness will determine the amps needed for the MIG welder you are considering.

The following shows maximum steel thickness for a butt weld based on amps (approx):

  • 90 amp, 2.0 mm
  • 110 amp, 2.5 mm
  • 130 amp, 3.0 mm
  • 150 amp, 4.0 mm
  • 180 amp, 5.0 mm

Keys to Using a MIG Welder

A MIG welder works through the creation of an arc between the parent metal being welded and the wire electrode. The arc creates the weld which is sealed and protected from elements by shielding gas being fed to the arc. A MIG weld generates a lot of heat and light and the welder must wear a protective shield to protect his or her eyes from ultra violet rays.

The Difference between TIG and MIG Welding

TIG welding uses a tungsten electrode. The electrode does not burn off or melt during the welding process. MIG welding uses a wire, which melts off into the weld pool. MIG welding was developed in the 1940s as a way to bind aluminum and nonferrous metals while TIG welding has been developed as a more specialist form of stainless welding steel, aluminum, copper and magnesium alloys.

Safety

One of the basics related to MIG welding is the observation of safety procedures. MIG welding uses a torch assembly that holds a consumable wire electrode that creates the weld. The welder must maintain a short arc in order for the weld to be effective. Wearing a safety shield and ear plugs and not wearing loose, combustible clothing are essential to a safe working environment when using a MIG welder.

Competency in MIG Welding comes when the operator can “set up” the machine for a particular welded joint.

Set up meaning that he or she can set the variable parameters of the welding machine (wire feed speed, amperage, gas flow) and handle the torch assembly accurately to maintain an even fillet of weld, which has sufficient penetration into the parent metal to melt and mix the molten parent and filler material into one,creating a good strong weld, and also have the skill and knowledge to maintain correct torch angles, distances from the welded joint and speed at which the operator moves the torch along the welded joint.

A MIG welder can be very useful for some car projects.

  • Floor panels.  Floor repairs are common particularly on older cars where the effects of water ingress into welded joints rapidly combines with road salt and damp atmosphere to speed up oxidation (better known as corrosion or rust).
  • Tube frames. Roll cages for racing, space frame chassis and chassis rail repairs.
  • Exhaust repair. Ideally suited to MIG welding, why replace an exhaust silencer box when you can MIG weld a “patch” on it stop gases leaking out
  • Bodywork. Welds on the bodywork can be very difficult for a novice MIG welder to produce successfully. This is mainly down to lack of skill in controlling heat input and distortion, although as your skill level increases this will be possible.

Thanks for reading our blog – we hope this has been of use to you.

Recommended sites

FLASH CUSTOMS – Specialist Custom Car & Motorcycle Parts
Loaded Wallet – Discount and cash back offers
Cash Back – Cash Back & Money Saving offers

What to look for when buying a MIG Welder

At some point or other those of us that “tinker” and modify cars or motorcycles, off road vehicles, race and track day cars and motorcycles will need to “weld” something, even if its only a simple bracket, or repair patch on a sill or chassis.

There is no getting around it that having the skill and equipment to weld small parts would be very useful in this instance.

A MIG welder is typically used in the automobile repair & fabrication industry. The process of MIG or metal inert gas welding involves a consumable wire electrode (fed through a torch assembly) & a supply of shielding gas (again fed through a torch assembly)to protect the weld. This differs from TIG welding, which makes use of a fixed, non-consumable tungsten electrode that produces a high energy arc. The method is rarely used outside, due to the effect of breeze blowing away the shielding gas, but is common inside a workshop or automotive repair facility.

Here is my beginners guide to selecting the right MIG welder for your needs.

  1. There’s lots of things to think about, electrical supply, space, where you will be welding, what you will be welding, budget and lots of more
  2. Another thought is that anyone with no experience in MIG welding really ought to seek professional advice and at least do a bit of research on MIG welding before jumping in with both feet. Please don’t just go out and buy the first MIG plant that you see.
  3. Take some time and consider what it is you want to be welding, will you be wanting to weld for example a modern-ish car (monocoque  chassis) or a vehicle such as an off roader with a  separate chassis. For a modern car with relatively thin body panels a Mig welder of approx 100amps range may suffice. For heavier chassis repair work a Mig welder with a 150amps range or more may be required. Certainly if you are going to be welding gates, railings, or any such thicker material a MIG welder with an output of 180 / 200 amp output may be required.
  4. So think about what use you will be needing the welding plant for, not just your budget, it would be false economy just to opt for the cheapest brand / welder and expect it to work miracles and weld everything in the world.
  5. Most “DIY” MIG welders will be supplied from a 240volt, 13 amp household socket. This tends to be the case up to approx 180 / 200amps, dependant on welder, make, model, specification etc. Any higher (or in some instances less) and you may need to look at installing a 16 amp or even 32 amp rated socket.

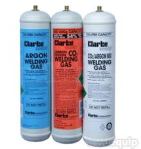
  • Over the years I have owned at various points several MIG welders from DIY to 3 phase industrial welders, I started off with a little Sealey mini MIG 100 amp set, this worked fine for basic bodywork, sill repairs, valance repairs, and single skin welding, and although in those early days there were not “gas less” MIG sets on the market I used to run this set with shielding gas – from a pub bottle. This was co2 – carbon dioxide used in the pub trade. Although a most basic set with only 4 settings it worked well once set up correctly.
  • Once I got into some other modifications and repair work I brought a Clarke 180amp “turbo” (fan cooling) single phase MIG set, again running on co2 pub gas, this worked great on heavier thickness’s, 3 & 4mm chassis plates, land rover repairs and welding new floor pans in VW beetles. Again this only had 4 heat or “output” settings with adjustable wire feed.
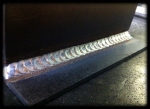
  • Although many people say that they can weld, the real difficulty with MIG welding is that it can look a “nice” clean, even fillet and yet still be a very poor, “weak” weld due to lack of penetration into the parent metal. In effect the weld “bead” sits on the top of the material being welded. This can be caused through lack of heat input, incorrect torch angle, weld contaminants (paint, grease, under seal, corrosion etc), lack of operator skill. This is particularly important when welding critical parts / support structures. I always say “set” the welding plant parameters up using a piece of off cut or scrap material to ensure your weld is good and strong, before continuing to weld your actual job.
  • Further to this “professional” MIG welders that I have used over the years up to 3 phase supply (3x 240v supply), 400 amps a “Fronius” electronic, programmable machine with LED touch screen controls and very technical parameter set up and control was by far the best (also by far the most expensive).

Considerations of cost and quality of machine, reliability and access to spares is another important factor in making a purchase. We all look at the dreaded eBay for prices and varying types of the product we are looking at buying. I would advise that anyone buying a MIG welding plant complete some research first and  DO NOT in any circumstances buy the cheapest machine you can see on-line.

THINK ABOUT – What you need the welder for, is it a common make or brand, can you find feedback or reviews about the machine you are interested in, can you get spares for it (we will discuss this later), will the machine rating be adequate for your welding – e.g. if you are welding patch repairs in cars will the machine weld for more than 10 minutes or so without overheating and cutting out?
This is what we call “duty cycle time” for example the manufacturer may state “duty cycle 10% at 75% max amperage. Therefore if your welders maximum amperage is 100 you can weld at 75amps for 10% of any time period (e.g. 6mins in any 1hr). This may be absolutely fine if you are completing spot welds, short stitch welds or small welds in between “setting up”. This is typical of cheap MIG welding machines for DIY use.

You may need to check that your power supply where you wish to weld is adequate – be careful to check specification of welding machine before purchase as I have seen some put the supply rating (e.g. 16amps) at the bottom of the spec listing. This means that the machine will not successfully run from a standard 3 pin 240v 13amp household socket.

Buy a machine with good ratings and feedback , if unsure speak to your local welding supplier (search yell.com), dont be frightened to ask for advice – you may not buy a machine from them but if they are business “savvy” they will do what they can as if they are helpful you may well go back to them for spares.

On the subject of spares – typical spares you may need are:- Contact Tips, filler wire reels, gas shrouds (sometimes called nozzle), in some cases disposable gas bottles (for shielding gas), if your machine breaks down:- common items needed may be gas valve, contactor, switches, torch assembly, torch lead, torch lead liner.

Finally, make sure you buy a welding plant from a reputable dealer with a warranty.

If you require any help and advice in welding related issues please  email us directly at sales@flashcustoms.co.uk

We are specialist custom parts manufacturers, Welding, Machining and Fabrication are our forte

Thanks for reading our blog – we hope this has been of use to you.

Recommended sites

FLASH CUSTOMS – Specialist Custom Car & Motorcycle Parts
Automotive LED Lights – Car & Motorcycle LED Lighting Solutions
Loaded Wallet – Discount and cash back offers
Cash Back – Cash Back & Money Saving offers